Implementing SSO with Azure AD in ColdFusion

Introduction
In today’s digital landscape, security is more critical than ever. With the rise of cyber threats and data breaches, organizations must prioritize protecting their systems and user data. One effective way to enhance security is through Single Sign-On (SSO), which simplifies the authentication process and reduces the risk of password-related vulnerabilities.
SSO allows users to log in once and gain access to multiple applications without needing to re-enter their credentials. This not only improves the user experience but also strengthens security by centralizing authentication. Azure Active Directory (Azure AD), combined with OpenID Connect, provides a robust solution for implementing SSO in applications. In this blog, I will demonstrate how to implement SSO using ColdFusion as my programming language.
Prerequisites
Before diving into the implementation, make sure you have the following:
- An Azure AD tenant
- An application registered in Azure AD
- Basic knowledge of OAuth 2.0 and OpenID Connect
- ColdFusion server set up
Step-by-Step Implementation
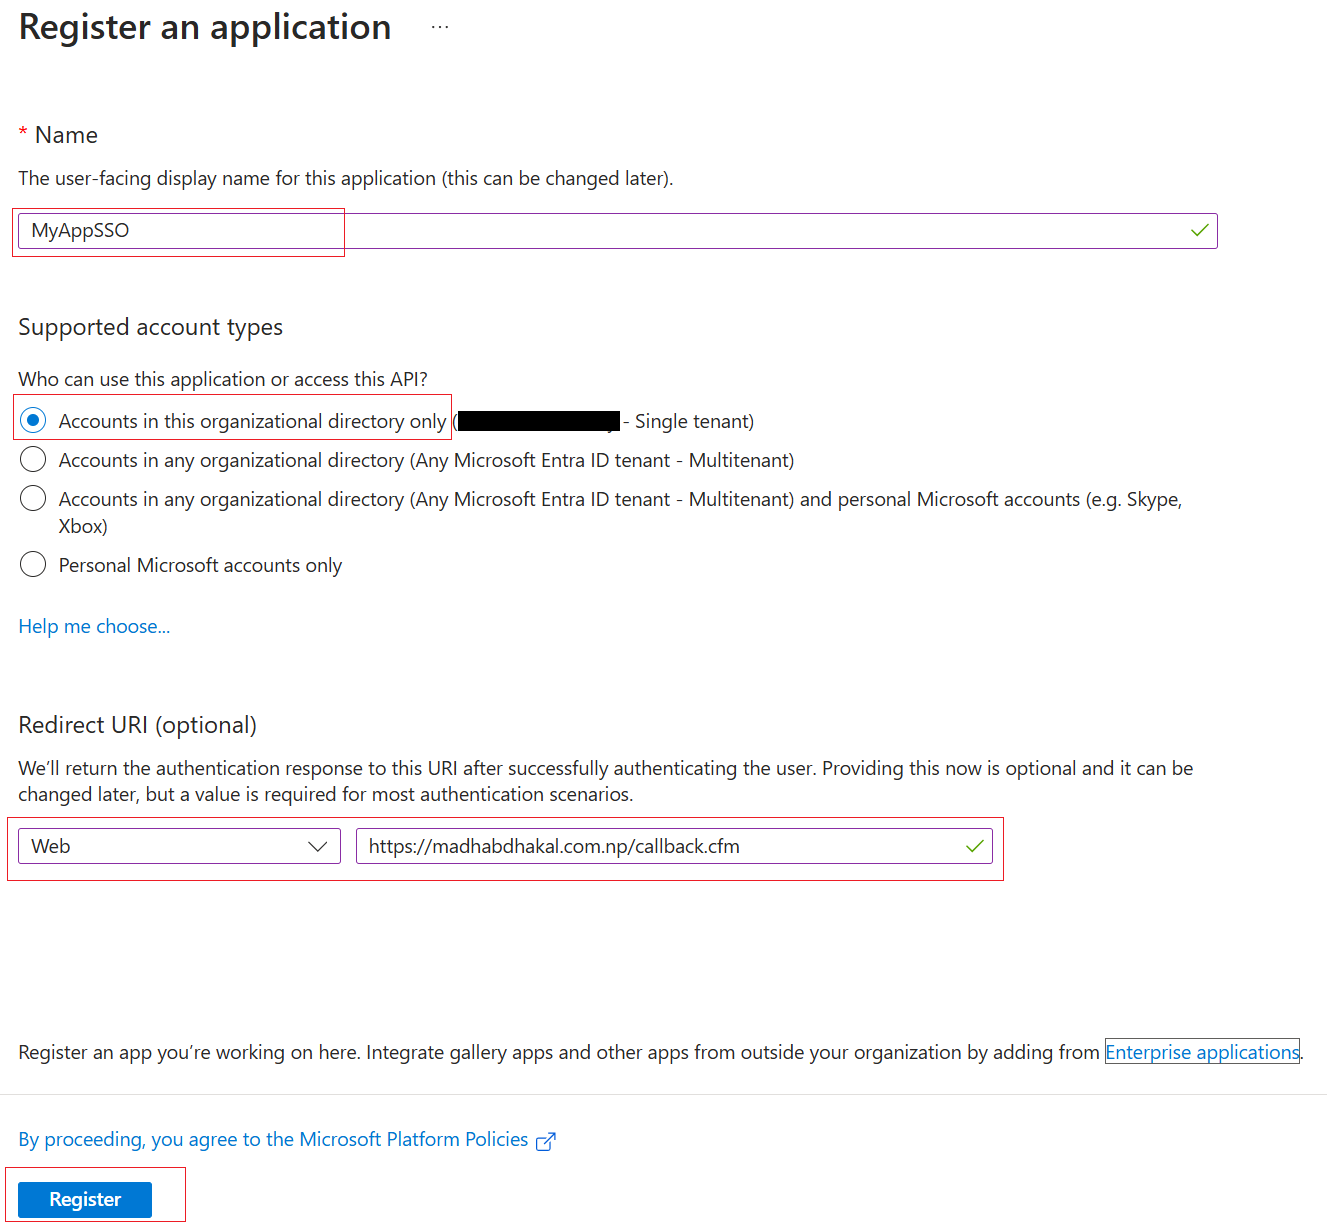
Register Your Application in Azure AD
The first step is to register your application in Azure AD. This registration allows Azure AD to recognize your application and provide it with the necessary credentials for authentication.
Steps:
- Log in to the Azure portal and navigate to Azure Active Directory.
- Select “App registrations” and click on “New registration.”
- Enter a name for your application, such as “MyAppSSO.”
- Specify the redirect URI. This is the URL where users will be redirected after they authenticate. For example,
https://yourapp.com/callback. - Click “Register” to create the application.
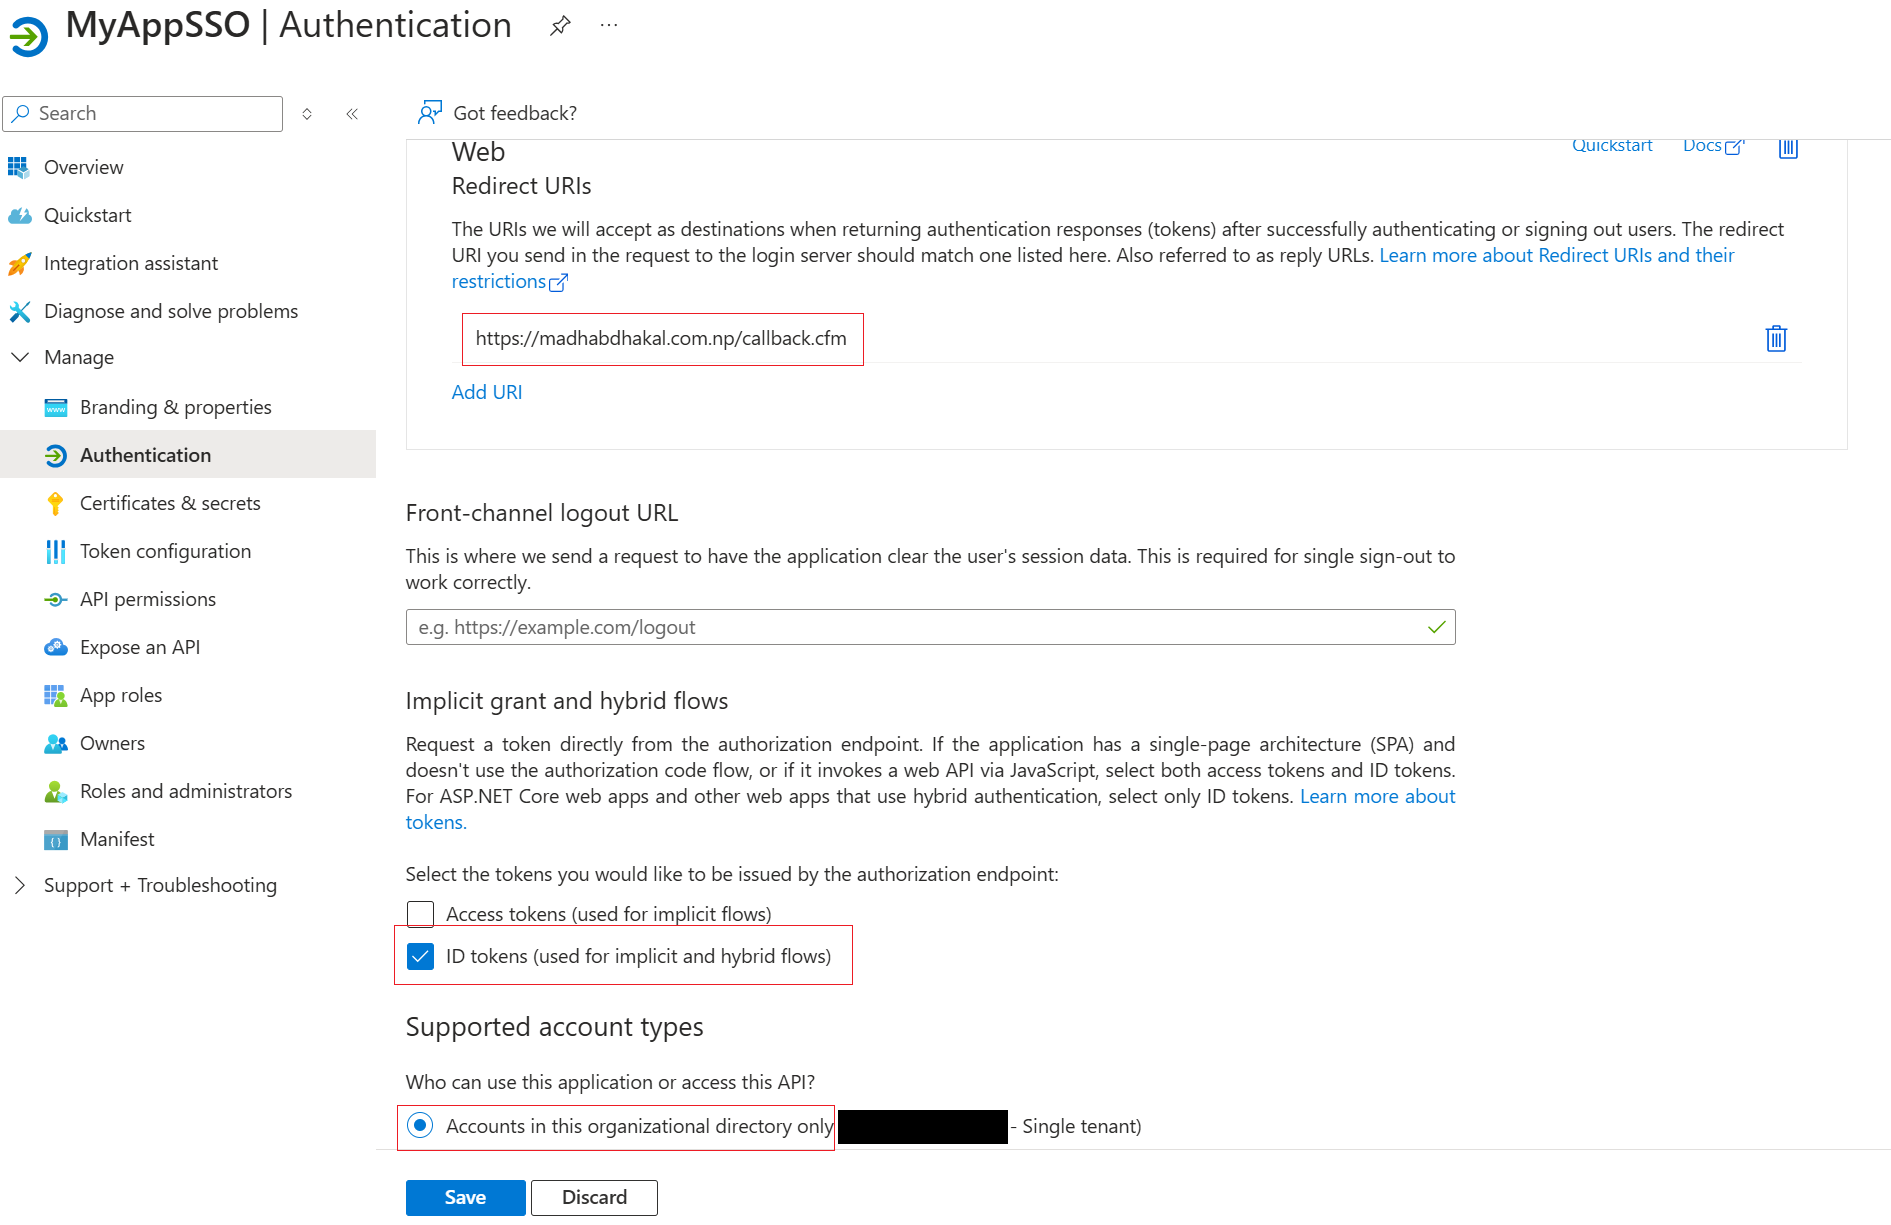
Configure Authentication
After registering the application, you need to configure the authentication settings. This involves specifying the redirect URI and enabling ID tokens.
Steps:
- In the App registrations section, select your newly registered application.
- Navigate to the “Authentication” tab.
- Click on “Add a platform” and select “Web”.
- Enter the redirect URI you specified during registration.
- Under “Implicit grant and hybrid flows”, enable ID tokens. This allows your application to receive ID tokens directly from Azure AD.
3. Set Up OpenID Connect in Your ColdFusion Application
Now, you need to set up OpenID Connect in your ColdFusion application. This involves configuring the necessary endpoints and handling HTTP requests using the cfhttp tag.
- Install the necessary libraries. You can use the
cfhttptag in ColdFusion to handle HTTP requests. - Configure the OpenID Connect endpoints in your ColdFusion application. Here’s an example configuration:
<cfset clientId = "your-client-id">
<cfset clientSecret = "your-client-secret">
<cfset redirectUri = "https://yourapp.com/callback">
<cfset authority = "https://login.microsoftonline.com/your-tenant-id">
<cfset tokenEndpoint = "#authority#/oauth2/v2.0/token">
<cfset authorizeEndpoint = "#authority#/oauth2/v2.0/authorize">
4. Implement the Authentication Flow
The final step is to implement the authentication flow. This involves redirecting users to the Azure AD login page, handling the callback, and validating the ID token.
- Redirect users to the Azure AD login page:
<cfset state = createUUID()>
<cfset nonce = createUUID()>
<cfset authUrl = "#authorizeEndpoint#?client_id=#clientId#&response_type=id_token&redirect_uri=#redirectUri#&response_mode=form_post&scope=openid&state=#state#&nonce=#nonce#">

<cflocation url="#authUrl#">
- Handle the callback from Azure AD and validate the ID token:
<cfif structKeyExists(form, "id_token")>
    <cfset idToken = form.id_token>
    <!--- Validate the ID token here --->
    <cfset session.user = parseJwt(idToken)>
</cfif>
- Store the user’s session and provide access to protected resources:
<cfif structKeyExists(session, "user")>
    <!--- User is authenticated, provide access to protected resources --->
</cfif>
Conclusion
Implementing SSO with Azure AD and OpenID Connect in ColdFusion can significantly enhance the security and user experience of your applications. By following the detailed steps outlined in this post, you can set up a robust SSO solution that simplifies authentication for your users.
If you have any questions or run into issues during the implementation, feel free to reach out in the comments below. Happy coding!